dr pen needle guide

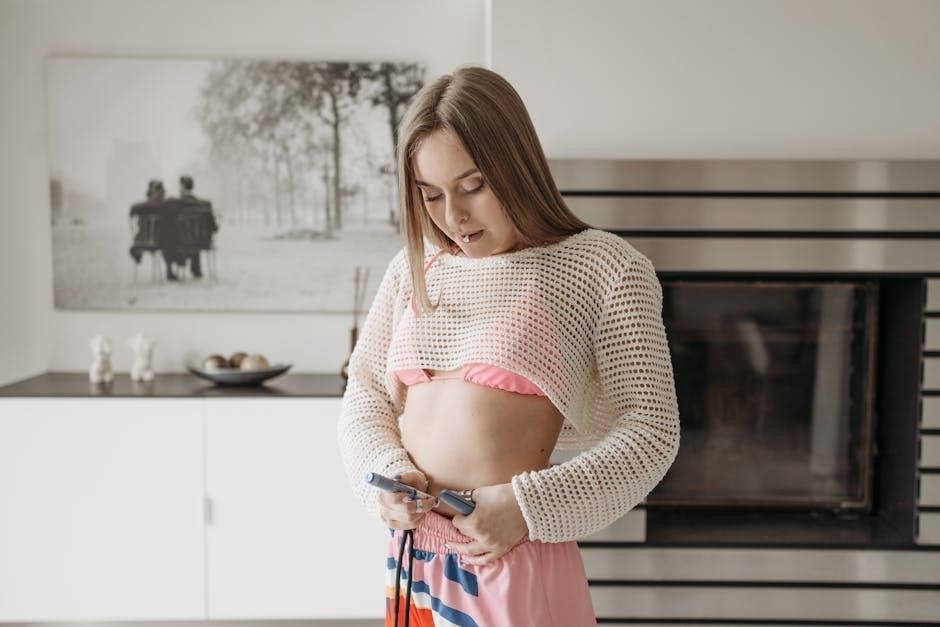
The Dr. Pen is an automated microneedling device designed to stimulate collagen production, rejuvenate skin, and treat scars. It’s a safe, efficient tool for professional and at-home use.
1.1 What is Dr; Pen and Its Benefits
The Dr. Pen is an automated microneedling device designed for skin rejuvenation. It uses fine needles to create micro-injuries, stimulating collagen production and promoting a smoother, youthful appearance.
Its benefits include reducing acne scars, fine lines, and hyperpigmentation. The device is safe for at-home use, offering consistent results with minimal downtime, making it a popular choice for skincare enthusiasts seeking professional-grade outcomes.
1.2 Importance of Proper Usage and Safety
Proper usage and safety are crucial when using the Dr. Pen to ensure effective results and prevent complications. Always disinfect the device and use sterile needles to minimize infection risks.
Follow the manufacturer’s guidelines for needle depth and technique to avoid skin irritation or needle breakage. Improper use can lead to adverse effects, so adherence to safety protocols is essential for a successful treatment experience.

Preparation Steps Before Using Dr. Pen
Preparation is key for safe and effective Dr. Pen usage. Cleanse and disinfect the device, prepare your skin, and choose the right needle for optimal results.
2.1 Skin Preparation and Cleansing
Proper skin preparation ensures safe and effective microneedling. Begin by cleansing your face with a gentle, non-comedogenic cleanser to remove dirt and makeup. Pat dry thoroughly with a clean towel. Avoid using exfoliants or irritants 24 hours before treatment. If using numbing cream, apply it 20-30 minutes prior and wipe it off before starting. Cleanse again with saline solution to maintain hygiene. This step is crucial for preventing infections and ensuring optimal results.
- Use a mild cleanser to avoid irritation.
- Avoid heavy makeup or skincare products beforehand.
- Wait 15-20 minutes after cleansing before starting treatment.
2.2 Disinfecting the Dr. Pen Device
Disinfecting the Dr. Pen is essential for maintaining hygiene and preventing infections. Spray isopropyl alcohol onto the needles and let it air dry. Repeat this process before and after use to ensure sterility. Always use disposable needles from sealed packaging. Avoid touching the needle tips to prevent contamination. Proper disinfection ensures a safe and effective treatment, reducing the risk of complications.
- Spray isopropyl alcohol on the needles.
- Allow the device to air dry completely.
- Use sterile, disposable needles for each session.
2.3 Choosing the Right Needle Size and Gauge
Selecting the appropriate needle size and gauge is crucial for effective treatment. Needle length varies, with shorter needles (0.5-1.5mm) suitable for delicate areas and longer needles (2-3mm) for deeper concerns like scars. The gauge refers to the needle thickness, with finer gauges (higher numbers) causing less trauma. Choose based on skin thickness and treatment goals to ensure optimal results and minimize discomfort.
- Shorter needles for surface concerns.
- Longer needles for deep collagen stimulation.
- Fine gauges for sensitive areas.
Step-by-Step Guide to Using Dr. Pen
Dr. Pen’s microneedling process involves attaching the needle cartridge, adjusting depth, applying numbing cream if needed, and gliding the pen vertically, horizontally, and diagonally across the skin.
3.1 Attaching the Needle Cartridge
To attach the needle cartridge, remove the front cap and unscrew the metal part. Take a new needle, remove its foil, and screw it onto the metal section. Ensure the needle cover is secure. This ensures safety and proper function during microneedling. Always handle the needle with care to avoid bending or breaking. Proper attachment is vital for effective treatment.
3.2 Adjusting the Needle Depth
Adjust the needle depth using the device’s button or dial to customize treatment for different skin areas. Deeper settings suit thicker skin, while shallower depths are ideal for delicate zones. Always start with a lower setting and gradually increase as needed. Proper adjustment ensures safety and effectiveness, minimizing discomfort and maximizing results. Refer to the microneedling depth chart for guidance tailored to your skin type and treatment goals.
3.4 Applying Numbing Cream (Optional)
For a more comfortable experience, apply a thin layer of numbing cream to the treatment area 20-30 minutes before microneedling. Gently massage it in, avoiding sensitive zones like the eyes. Allow the cream to take effect, then remove it thoroughly with a cleanser before proceeding. This step is optional but recommended for sensitive skin. Always follow the product’s instructions for optimal results and safety.
3.5 Starting with Vertical, Horizontal, and Diagonal Movements

Begin by gliding the Dr. Pen vertically across the treatment area, ensuring even coverage. Follow with horizontal strokes, then diagonal movements in both directions. Use light pressure to avoid dragging the pen, which could cause irritation. This multi-directional approach ensures thorough stimulation of the skin, promoting collagen production and achieving a more youthful appearance. Work in small sections for consistency and optimal results.

Techniques for Different Facial Areas
Adjust techniques based on skin thickness and sensitivity. Use gentle strokes for delicate areas like under the eyes, while firmer pressure suits thicker skin on the forehead and cheeks.
4.1 Delicate Areas (Under Eyes, Around Mouth)
For delicate areas like the under eyes and around the mouth, use light pressure and gentle, outward motions. These areas require extra care to avoid irritation. Apply serum beforehand for smooth gliding and minimal drag. Maintain short, controlled strokes, ensuring the pen moves in a cross pattern to cover evenly without applying excessive force, which could cause discomfort or damage to sensitive skin.
4.2 Thicker Skin Areas (Forehead, Cheeks)
For thicker skin areas like the forehead and cheeks, use a slightly deeper needle setting and moderate pressure. Move the pen in vertical, horizontal, and diagonal directions to ensure even coverage. Avoid excessive pressure to prevent irritation. Apply serum beforehand for smooth gliding and to minimize drag. Focus on covering the area thoroughly, but avoid over-treating any single spot to maintain comfort and effectiveness during the microneedling process.
4.3 Avoiding Sensitive Zones and Proper Pen Handling
When using the Dr. Pen, it’s crucial to avoid sensitive zones such as the under-eye area, mouth contours, and bony prominences. Proper pen handling involves holding the device at a slight angle, using light to moderate pressure, and gliding smoothly without dragging. Always maintain control over the pen’s movement to prevent accidental needle bends or breaks. This ensures safety and effectiveness during microneedling treatments, particularly on delicate or sensitive facial areas.

Post-Microneedling Care and Safety
Post-microneedling care involves gentle cleansing, avoiding makeup, and using recommended products for recovery. Monitor for signs of proper healing and be aware of potential complications to ensure skin safety and optimal results.
5.1 Hygiene Practices After Treatment
After microneedling, maintaining proper hygiene is crucial to prevent infections. Gently cleanse the treated area with a mild, fragrance-free cleanser twice daily. Avoid touching the area excessively and keep it moisturized with hyaluronic acid or recommended serums. Refrain from using makeup or harsh products for at least 24 hours. Ensure hands are clean before touching the skin, and avoid swimming or sweating heavily until healing begins.
5.2 Recommended Products for Skin Recovery
Post-microneedling recovery benefits from using products rich in hyaluronic acid, vitamin C, and aloe vera to soothe and hydrate the skin. Apply serums or creams with these ingredients to promote healing and minimize redness. Avoid products containing alcohol, retinoids, or exfoliants during the initial recovery phase. Use gentle, fragrance-free moisturizers to support the skin’s natural barrier and enhance the treatment results.
5.3 Signs of Proper Healing and Potential Complications
Proper healing after microneedling typically shows mild redness, swelling, and skin dryness that resolve within a few days.
Your skin may feel tight or sensitive but should improve gradually.
Prolonged redness, inflammation, or scarring may indicate improper technique or aftercare.
In rare cases, infections or uneven skin texture can occur if hygiene practices are not followed.
Monitor your skin’s response and seek professional advice if complications arise.
Maintenance and Storage of Dr. Pen
Regularly clean and disinfect the Dr. Pen after use to prevent contamination. Replace needles after each session and store the device in a protective case to maintain hygiene and functionality.
6.1 Cleaning the Device After Use
Properly cleaning the Dr. Pen after each use is essential to maintain hygiene and functionality. Disinfect the device with 70% alcohol, focusing on the needle cartridge area. Use a soft cloth to wipe down the pen, ensuring no residue remains. Avoid harsh chemicals that could damage the device. Rinse with sterile water if necessary, then allow the pen to air-dry completely before storage. Regular cleaning prevents contamination and extends the device’s lifespan. Always follow the manufacturer’s guidelines for optimal maintenance.
6.2 Replacing and Disposing of Needles
After each use, detach the needle cartridge and carefully dispose of it in a biohazard container to prevent injury or contamination. Replace the cartridge with a new, sterile needle, ensuring it is securely attached. Use 70% alcohol to disinfect the area before attaching a new needle. Always wear protective gloves during disposal to maintain safety. Proper disposal and replacement ensure hygiene and prevent cross-contamination, keeping the device safe for future use. Follow manufacturer guidelines for disposal to minimize environmental impact.
6.3 Proper Storage to Maintain Hygiene
Store the Dr. Pen in a protective case to prevent damage and contamination. After cleaning, allow the device to air-dry before storing. Keep it in a cool, dry place away from direct sunlight and moisture. Regularly sanitize the storage area to maintain hygiene. Always store the pen with its protective cap on to prevent dust accumulation. Proper storage ensures the device remains in optimal condition for future use and maintains its sterility.
Tips for Optimal Results
For optimal results, use light pressure, apply serums for smooth gliding, and adjust speed settings for comfort. This enhances skin response and minimizes irritation, ensuring safe and effective treatments. Always follow proper microneedling techniques and maintain hygiene to achieve the best outcomes. Consistency and patience are key for visible improvements in skin texture and appearance. Regular use with proper care will maximize the benefits of your Dr. Pen treatments while maintaining skin health. Proper handling and storage of the device are also crucial for longevity and hygiene. By adhering to these tips, you can enjoy a rejuvenated and youthful complexion with minimal downtime. Remember to tailor your approach to different skin areas for customized results. Avoid over-treatment and follow post-care instructions diligently to support the healing process. Your commitment to these guidelines will ensure safe and effective use of the Dr. Pen. Always prioritize skin safety and hygiene to achieve optimal results.
7.1 Using Light Pressure for Better Skin Response
Applying light pressure with the Dr. Pen ensures even needle penetration, promoting consistent micro-injuries for effective collagen production. Excessive pressure can cause discomfort or skin damage, while too little may reduce efficacy. Maintain gentle, steady strokes, adjusting as needed based on skin sensitivity. Light pressure enhances safety and results, allowing the device to glide smoothly without dragging or pulling the skin. This technique is crucial for optimal outcomes and user comfort, ensuring a positive microneedling experience. Proper pressure control minimizes irritation and maximizes the rejuvenating benefits of the treatment. Always prioritize gentle handling to protect your skin and achieve the desired results. Light pressure is key to a successful and safe microneedling session. By maintaining this approach, you can enjoy healthier, more radiant skin with minimal downtime. Remember, consistency and care are essential for achieving the best possible outcomes with your Dr. Pen. Light pressure ensures both safety and effectiveness, making it a fundamental aspect of proper device usage. Adhering to this guideline will help you reap the full benefits of microneedling while maintaining skin integrity. Avoiding excessive force prevents complications, ensuring a smooth and effective treatment process. Light pressure is the cornerstone of successful microneedling, promoting natural healing and skin rejuvenation. Always use light pressure to safeguard your skin and enhance the overall results of your Dr. Pen treatments. This simple yet important technique makes all the difference in achieving a youthful and healthy complexion. By doing so, you ensure a safe and effective experience that delivers lasting improvements. Light pressure is essential for balancing safety and efficacy, making it a critical factor in your microneedling routine. Embrace this approach to unlock the full potential of your Dr. Pen and enjoy the benefits of professional-grade skincare in the comfort of your home. Always remember, light pressure is the key to better skin response and optimal results.
7.2 Serum Application for Smooth Gliding
Applying a serum before microneedling ensures the Dr. Pen glides smoothly over the skin, reducing friction and preventing dragging or pulling. Hyaluronic acid or vitamin C serums are ideal, as they hydrate the skin and enhance penetration. This step minimizes discomfort and improves the device’s performance. Always apply a thin, even layer to the treatment area before starting. Proper serum application promotes better needle movement and maximizes the effectiveness of the microneedling session.
7.3 Customizing Speed Settings for Comfort
Adjusting the speed settings on the Dr. Pen enhances comfort during microneedling. Lower speeds are ideal for sensitive areas or beginners, while higher speeds suit thicker skin. Start with the lowest setting and gradually increase as needed. Customizing the speed ensures a balance between effectiveness and comfort, allowing for a personalized experience. Proper speed adjustment reduces discomfort and helps achieve optimal results without causing unnecessary irritation or stress to the skin.
Troubleshooting Common Issues
Address needle breakage by replacing it immediately. For skin irritation, apply soothing products. If the device malfunctions, check settings or consult the user manual for guidance.
8.1 Needle Breakage or Bending
Needle breakage or bending can occur due to improper technique, excessive pressure, or dragging the pen. To address this, stop immediately and replace the needle. Always use light pressure and avoid dragging. Ensure the pen is held at the correct angle and speed. Regularly inspect needles for damage. For prevention, choose appropriate needle lengths and gauges for your skin type and area being treated. Proper handling and storage can minimize such issues.
8.2 Skin Irritation or Redness
Skin irritation or redness can occur due to improper technique, excessive pressure, or sensitivity to the treatment. To minimize discomfort, apply a soothing serum or aloe vera gel post-treatment. Using light pressure and avoiding dragging the pen can help reduce irritation. If redness persists, consider lowering the needle depth or adjusting the speed setting. Applying numbing cream before treatment can also help alleviate discomfort and prevent irritation.
8.3 Device Malfunction and Maintenance
Device malfunction can occur due to improper maintenance or clogged needles. Regularly clean the device with alcohol and ensure needles are replaced after each use. Store the pen in a dry, hygienic environment to prevent damage. If the device malfunctions, check for blockages or worn-out parts. Refer to the user manual for troubleshooting steps or contact customer support for assistance. Proper maintenance ensures optimal performance and longevity of the Dr. Pen.
Discover the ultimate guide to using the Dr. Pen Needle for paintball and airsoft. Boost your skills with expert tips and tricks!