arctic king freezer manual troubleshooting
Arctic King Freezer Manual Troubleshooting: A Comprehensive Guide
Navigating issues with your Arctic King freezer? This guide offers detailed steps for diagnosis and repair, covering electrical faults, cooling problems, and more, ensuring optimal performance.
Understanding Your Arctic King Freezer
Arctic King freezers, known for reliable food preservation, come in various models – chest freezers, upright freezers, and compact options. Familiarizing yourself with your specific model’s features is crucial for effective troubleshooting. Understanding the core components, like the compressor, evaporator fan, condenser fan, and defrost system, empowers you to pinpoint potential issues.
These freezers utilize a refrigeration cycle to maintain low temperatures. The compressor circulates refrigerant, the evaporator absorbs heat, and the condenser releases it. Proper airflow, ensured by the fans, is vital. Ice buildup, a common concern, can hinder performance. Regularly checking the door seals and defrosting when ice reaches 5-10mm is recommended for longevity and efficiency. Knowing these basics simplifies the repair process.
Safety Precautions Before Troubleshooting

Prioritize safety when attempting any freezer repair. Always disconnect the freezer from the power supply – unplug it or switch off the circuit breaker – to prevent electrical shock. Avoid working with electrical components if you’re uncomfortable or lack experience; professional assistance is recommended. Wear appropriate safety gear, including gloves and eye protection, when handling tools or potentially hazardous parts.
Be mindful of refrigerant, a potentially harmful substance; never attempt to handle or discharge it yourself. If a refrigerant leak is suspected, contact a qualified technician immediately. When dealing with the compressor or electrical wiring, exercise extreme caution. Remember, improper repairs can void your warranty and create further hazards.
Common Arctic King Freezer Problems
Arctic King freezers can experience several common issues. A frequent complaint is the freezer not cooling adequately, often stemming from a faulty compressor, condenser fan, or evaporator fan. Another prevalent problem is a freezer running constantly, potentially indicating a door seal leak, a malfunctioning defrost system, or a thermostat issue. Excessive ice buildup is also common, impacting storage space and door functionality.
Electrical problems, such as the freezer not operating at all, can be traced to power supply issues or a tripped circuit breaker. Compressor failures, often linked to a defective run capacitor, are also observed. Addressing these issues promptly can prevent further damage and food spoilage.
Freezer Not Cooling: Initial Checks
Before diving into complex repairs, perform these initial checks. First, ensure the freezer is properly plugged into a functioning outlet. Verify the circuit breaker hasn’t tripped or a fuse blown. Confirm the temperature settings aren’t set too high. Inspect the door seals for any gaps or damage, as this allows warm air to enter.
Listen for the compressor; if it’s not running, further investigation is needed. Check if the condenser fan is operating – it should be circulating air around the back of the freezer. Finally, ensure nothing is blocking the vents inside, restricting airflow. These simple steps often resolve minor cooling issues.
Freezer Running Constantly
A freezer running non-stop indicates a problem with its cooling cycle. Often, this stems from a dirty condenser coil, restricting heat dissipation. Clean the coils thoroughly with a brush or vacuum. Check the door seals – a poor seal forces the compressor to work harder. Excessive ice buildup inside can also cause continuous operation; defrost the freezer completely.
A faulty defrost system, specifically a malfunctioning defrost timer, heater, or thermostat, can lead to this issue. Inspect the run capacitor; a failing capacitor prevents the compressor from cycling off. If these checks don’t resolve the problem, a compressor issue might be present, requiring professional attention.
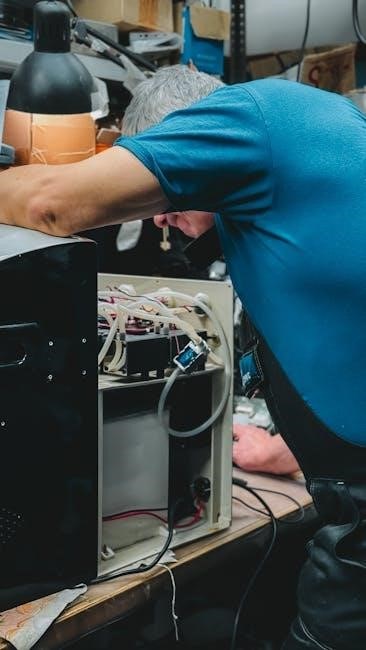
Diagnosing Electrical Issues
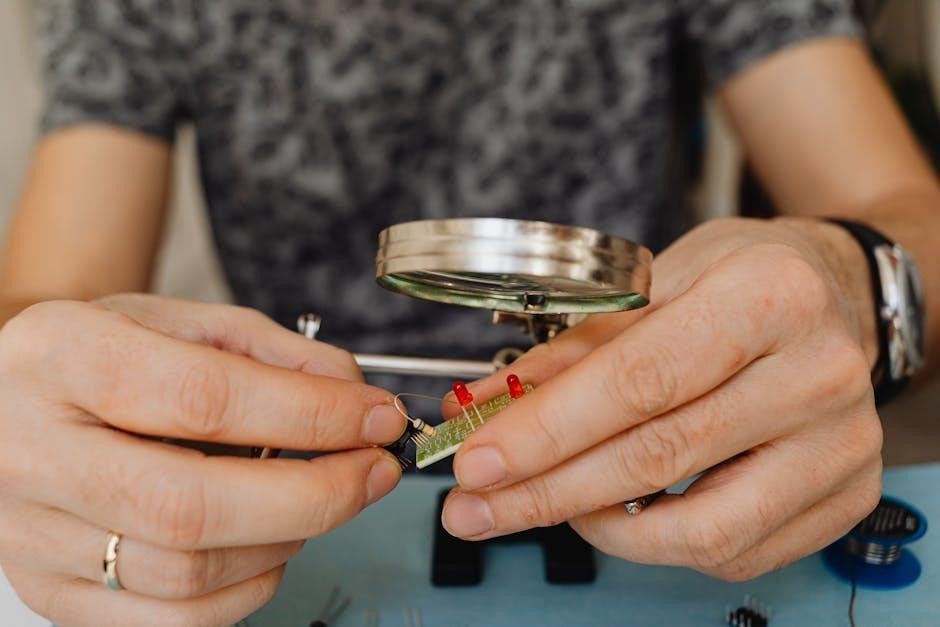
Electrical problems are common causes of freezer malfunctions. Begin by verifying the freezer is securely plugged into a functioning outlet. A tripped circuit breaker or blown fuse is a frequent culprit; reset the breaker or replace the fuse. Before proceeding, always disconnect power! Use a multimeter to test the outlet’s voltage, ensuring it delivers the correct power.

Inspect the power cord for any visible damage, such as cuts or fraying. A damaged cord requires immediate replacement. If the outlet tests good, the issue may lie within the freezer’s internal wiring or components, potentially involving the compressor or control board, necessitating professional diagnosis.
Checking the Power Supply & Circuit Breaker
Initial electrical checks are crucial. First, confirm the freezer’s power cord is firmly plugged into a working electrical outlet. Next, locate the circuit breaker controlling the freezer’s circuit in your electrical panel. If the breaker is in the “tripped” position, flip it fully off, then back on to reset it. If a fuse is used, check for a blown fuse and replace it with one of the correct amperage.
If the breaker trips again immediately, or the fuse blows repeatedly, there’s likely a short circuit within the freezer itself, requiring professional attention. Always disconnect the freezer from power before inspecting any electrical components.
Testing the Outlet with a Multimeter
Confirming outlet functionality requires a multimeter. Set the multimeter to measure AC voltage. Carefully insert the probes into the outlet – black to the neutral slot, and red to the hot slot. A reading of approximately 120 volts indicates a properly functioning outlet. If the voltage is significantly lower or zero, the outlet itself is the problem.
Do not proceed with freezer troubleshooting if the outlet isn’t providing correct voltage. Check other appliances on the same circuit to verify it’s not a broader electrical issue. If the outlet is faulty, consult a qualified electrician for repair or replacement before attempting further freezer diagnostics.
Compressor Problems & Solutions

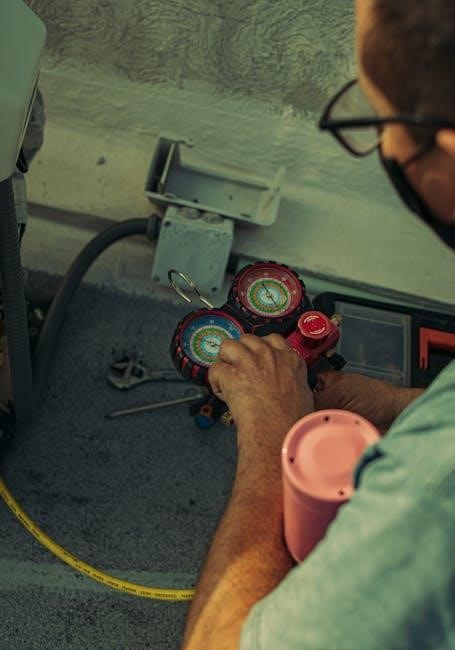
A failing compressor is a serious issue. Listen for clicking sounds – a lack of clicking suggests a potential electrical problem. If the compressor runs but doesn’t cycle on and off, the run capacitor might be defective, preventing proper operation. Testing the capacitor with a multimeter is crucial; a faulty capacitor needs replacement.
If the compressor isn’t running at all, it could be internally damaged. Compressor replacement is a complex task best left to a qualified technician due to refrigerant handling and specialized tools required. Attempting DIY compressor repair can be dangerous and void any remaining warranty.
Identifying a Faulty Compressor
Diagnosing a compressor issue begins with observation. A completely silent compressor, even with power supplied, strongly indicates a problem. Listen closely for unusual noises – loud humming, clicking that doesn’t lead to start-up, or rattling sounds. These suggest internal mechanical failure.
Visually inspect the compressor for any signs of physical damage, like oil leaks or bulging. A warm-to-the-touch compressor that isn’t running is also a red flag. However, confirming a faulty compressor requires electrical testing, specifically checking the windings for continuity using a multimeter. Remember, refrigerant handling requires professional expertise.
Run Capacitor Testing & Replacement
The run capacitor assists the compressor’s starting and running functions. A defective capacitor often prevents the compressor from cycling on, resulting in a non-functional freezer. Testing requires a multimeter with capacitance measurement capability. Always disconnect power before handling! Discharge the capacitor before testing to avoid electrical shock.
Compare the measured capacitance to the value printed on the capacitor itself (typically with a tolerance range). If the reading falls outside this range, the capacitor is faulty and needs replacement. Ensure the replacement capacitor has the same microfarad (µF) and voltage ratings. Proper installation is crucial; incorrect wiring can damage the compressor.
Fan Motor Troubleshooting
Efficient air circulation is vital for consistent freezer temperatures, relying on both evaporator and condenser fan motors. If your freezer isn’t cooling properly, these fans are prime suspects. Begin by visually inspecting the fan blades for obstructions like ice buildup or debris. Listen for unusual noises during operation – grinding or squealing indicates potential bearing failure.
To test, carefully access the fan motor (disconnect power first!) and attempt to spin the blades manually. Resistance suggests a failing motor. A multimeter can check for continuity, confirming if the motor is receiving power. Replacement is often straightforward, but ensure the new motor matches the original specifications.
Checking the Evaporator Fan Motor
The evaporator fan circulates cold air throughout the freezer compartment. A malfunctioning evaporator fan can lead to uneven temperatures or a freezer that isn’t cooling effectively. First, disconnect the freezer from power. Locate the evaporator fan, usually behind a panel inside the freezer. Inspect the fan blades for ice accumulation or obstructions hindering movement.
Manually spin the fan blade; it should rotate freely. If it’s stiff, the motor may be failing. Use a multimeter to test the fan motor for continuity. If there’s no continuity, the motor needs replacing. Carefully note the wiring configuration before disconnecting it for a smooth installation of the new component.
Inspecting the Condenser Fan Motor
The condenser fan dissipates heat from the compressor, crucial for efficient cooling. Locate the condenser fan, typically at the rear of the freezer, near the compressor. Disconnect power before inspection! Check for obstructions like dust, debris, or ice buildup hindering the fan blades. Manually spin the fan; it should turn freely without resistance.
A stiff or noisy fan indicates a potential motor issue. Use a multimeter to test the condenser fan motor for continuity. Lack of continuity signifies a faulty motor requiring replacement. Document the wiring connections before removal to ensure correct reinstallation. A properly functioning condenser fan is vital for maintaining optimal freezer performance.
Defrost System Issues
Ice buildup within your Arctic King freezer signals potential defrost system malfunctions. This system prevents excessive ice accumulation, ensuring efficient cooling; Key components include the defrost timer, defrost heater, and defrost thermostat. A faulty defrost timer may fail to initiate the defrost cycle, leading to ice buildup. The defrost heater melts the accumulated ice, and a malfunctioning heater won’t perform this function.
The defrost thermostat monitors temperature during the cycle, preventing overheating. Testing each component with a multimeter is crucial for diagnosis. A defective thermostat might not allow the heater to activate. Addressing these issues restores proper freezer operation and prevents long-term damage.
Understanding the Defrost Timer
The defrost timer is the brain of your Arctic King freezer’s automatic defrost system, initiating the defrost cycle at regular intervals – typically every 6 to 12 hours. It cycles the compressor off and activates the defrost heater. Timers can be mechanical or electronic; mechanical timers feature a rotating dial you can manually advance for testing.
A malfunctioning timer might get stuck, preventing the defrost cycle, or fail to advance, leading to ice buildup. To test a mechanical timer, manually advance it to the defrost cycle and listen for the heater to activate. If it doesn’t, the timer or heater may be faulty. Replacement is often necessary if the timer is defective.
Testing the Defrost Heater
The defrost heater melts the accumulated ice on the evaporator coils. To test it, always disconnect power to the freezer. Locate the heater – usually along the evaporator coils inside the freezer compartment. Using a multimeter set to the ohms setting, check for continuity across the heater terminals.
A reading of zero or a low resistance indicates a good heater. An infinite resistance (open circuit) signifies a burned-out heater requiring replacement. Visually inspect the heater for breaks or damage. Be cautious; even a seemingly intact heater can have internal breaks. If unsure, replace it – a faulty heater prevents proper defrosting, causing ice buildup and reduced cooling efficiency.
Diagnosing a Faulty Defrost Thermostat
The defrost thermostat, or defrost termination thermostat, monitors evaporator coil temperature, signaling the defrost heater to turn off when ice is melted. To test, disconnect power! Locate the thermostat – typically clipped to the evaporator coil. Use a multimeter set to continuity.
The thermostat should show continuity when cold (below freezing) and open (no continuity) when warm. Simulate warming the thermostat (carefully!) with a hairdryer – it should open the circuit. If it remains closed, it’s faulty and needs replacing. A malfunctioning thermostat can cause excessive defrosting or prevent defrosting altogether, leading to ice buildup and reduced freezer performance.
Door Seal & Ice Buildup
Proper door sealing is crucial for freezer efficiency. Inspect the door seals (gaskets) for cracks, tears, or gaps. A simple test: close the door on a dollar bill – it should offer resistance when pulling it out. If it slides easily, the seal is compromised and needs replacement.
Excessive ice buildup often stems from a faulty door seal allowing warm, moist air to enter. Regularly defrost your freezer, aiming for ice levels below 5-10mm. Ensure proper air circulation isn’t blocked by overfilled baskets. A damaged seal significantly impacts cooling performance and energy consumption, necessitating prompt attention.
Inspecting and Replacing Door Seals
Begin by visually inspecting the entire perimeter of the freezer door seal for any visible damage – cracks, tears, or areas where the seal is detached. Gently clean the seal with mild soap and water to remove any debris hindering a proper seal. To test, close the door on a piece of paper; if it pulls out easily, replacement is likely needed.
Replacing a door seal typically involves removing the old one (often held in place by clips or adhesive) and pressing the new seal firmly into the groove. Ensure a snug fit along the entire length. Replacement seals are readily available online or at appliance parts stores, often specific to your Arctic King model. A correctly installed seal restores efficiency.
Preventing Excessive Ice Buildup
Excessive ice buildup significantly reduces freezer efficiency and can damage components. Regularly defrost your Arctic King freezer when ice reaches 5-10mm thickness, as recommended. Avoid frequently opening the door, and ensure it closes completely each time, verifying the door seal is intact. Proper food storage is crucial; always wrap items tightly to minimize moisture release.
Avoid overfilling the freezer, as this restricts airflow. Check the defrost drain for blockages; a clogged drain prevents melted frost from escaping, leading to buildup. Consider a freezer alarm to alert you if the door is left ajar. Consistent maintenance prevents costly repairs and ensures optimal performance, extending the freezer’s lifespan.
Temperature Control Problems
Inconsistent temperatures within your Arctic King freezer can spoil food. Begin by verifying the temperature settings; ensure they are appropriately adjusted for your needs. If the freezer isn’t maintaining the set temperature, test the thermostat using a multimeter to confirm its functionality. A faulty thermostat may require replacement.
Check for airflow obstructions caused by overpacking or blocked vents. Ensure the door seals are intact, preventing warm air from entering. Frequent door openings also impact temperature stability. If the compressor cycles on and off frequently, it could indicate a thermostat issue or a problem with the compressor itself, requiring professional evaluation.
Adjusting the Temperature Settings
Proper temperature control is vital for food preservation. Locate the temperature control dial or digital panel inside your Arctic King freezer. Typically, a higher number indicates a colder setting. Start by adjusting the control to a mid-range setting and allow 24 hours for the temperature to stabilize.
Use a freezer thermometer to verify the actual temperature, aiming for 0°F (-18°C). If the freezer is too warm, lower the setting incrementally. Conversely, if it’s too cold and food is freezing solid, raise the setting. Avoid drastic adjustments, as this can strain the compressor. Remember to note the setting changes for future reference.
Testing the Thermostat
A faulty thermostat can cause inconsistent cooling. To test, you’ll need a multimeter set to the ohms setting. First, disconnect power to the freezer! Locate the thermostat – often a small box with wires attached, near the temperature control. Disconnect the wires from the thermostat terminals.
Place the multimeter probes on the thermostat terminals. A working thermostat should show continuity (a reading close to zero ohms) when cold. If it reads infinite resistance, the thermostat is likely defective and needs replacement. Always consult your freezer’s wiring diagram before disconnecting any wires, and prioritize safety by disconnecting power.
Arctic King Freezer Warranty Information
Understanding your Arctic King freezer’s warranty is crucial before attempting repairs. Generally, new Arctic King freezers come with a one-year limited warranty covering parts and labor for manufacturing defects. However, this coverage doesn’t extend to issues arising from improper use, accidents, or normal wear and tear.
Products purchased “as-is” or refurbished typically lack warranty coverage. Importantly, food loss due to freezer failure isn’t covered under the standard warranty. Retain your proof of purchase for warranty claims. Refer to your owner’s manual or the Arctic King website for specific warranty details and claim procedures.
Finding Arctic King Freezer Parts
Locating replacement parts for your Arctic King freezer can be straightforward. Several online retailers specialize in appliance parts, offering a wide selection of components. RepairClinic.com is a particularly valuable resource, providing parts diagrams and assistance in identifying the correct part for your specific model.
Other options include appliance parts distributors and local hardware stores. When ordering, always have your freezer’s model number handy to ensure compatibility. Be prepared to potentially search using compatible part numbers if the original Arctic King part number isn’t available. Careful part selection is key to a successful repair!
Resources for Arctic King Freezer Repair
Need extra help with your Arctic King freezer repair? Several online resources can provide valuable assistance. RepairClinic.com stands out, offering not only parts and detailed diagrams but also troubleshooting guides and video tutorials. Their email signup often includes promotional codes for discounts on parts, making repairs more affordable.
Furthermore, appliance repair forums and online communities are excellent places to connect with experienced DIYers and professionals. These platforms allow you to ask questions, share experiences, and find solutions to specific problems. Don’t hesitate to leverage these collective knowledge bases for a smoother repair process!
RepairClinic.com for Parts & Diagrams
RepairClinic.com is a premier online resource for Arctic King freezer parts and detailed diagrams. They boast an extensive inventory, allowing you to quickly locate the specific component needed for your repair, from compressors and fans to thermostats and defrost heaters. Their interactive diagrams are particularly helpful, visually guiding you through the freezer’s internal structure to identify the correct part.
Beyond parts, RepairClinic offers troubleshooting guides and video tutorials, providing step-by-step instructions for common repairs. Don’t forget to check for promotional codes when signing up for their email list – these can significantly reduce the cost of your parts, making your DIY repair even more economical!
Appliance Repair Forums & Communities
Online appliance repair forums and communities offer a valuable platform for sharing knowledge and seeking advice regarding your Arctic King freezer issues. These forums connect you with experienced DIYers and seasoned technicians who can provide insights into specific problems, offer troubleshooting tips, and suggest potential solutions.
Posting detailed descriptions of your freezer’s symptoms, along with the model number, can elicit targeted responses. You’ll find discussions covering a wide range of Arctic King freezer repairs, allowing you to learn from others’ experiences and avoid common pitfalls. Remember to always prioritize safety and follow proper electrical precautions when attempting any repair.

When to Call a Professional
While many Arctic King freezer issues are manageable with DIY troubleshooting, certain situations necessitate professional intervention. If you encounter electrical problems you’re uncomfortable addressing, or suspect a sealed system issue like a refrigerant leak, immediately contact a qualified appliance repair technician.
Attempting complex repairs without the proper training and tools can lead to further damage or even safety hazards. Similarly, if you’ve exhausted troubleshooting steps and the freezer remains non-functional, a professional diagnosis is crucial. Don’t hesitate to seek expert help to avoid costly repairs or potential food spoilage – prioritizing safety and efficiency is key.

Don’t let a broken Arctic King freezer spoil your food! Find easy troubleshooting & your freezer manual at Select Paintball & Airsoft. Get it fixed fast!